
Neptune Setup
NOTES
You need to add the script below to the BODY END HTML for the image slider and the wave shapes to work.
<script src="https://zauaewebmanager.z8.web.core.windows.net/scripts/sliders/bxslider/jquery.bxslider.min.js"></script>
<script>
$('<svg data-name="Layer 1" xmlns="http://www.w3.org/2000/svg" viewBox="0 0 1200 120" preserveAspectRatio="none" class="svgWaveBtm"><path d="M985.66,92.83C906.67,72,823.78,31,743.84,14.19c-82.26-17.34-168.06-16.33-250.45.39-57.84,11.73-114,31.07-172,41.86A600.21,600.21,0,0,1,0,27.35V120H1200V95.8C1132.19,118.92,1055.71,111.31,985.66,92.83Z" class="shape-fill"></path></svg>').appendTo('.waveBtm');
$('<svg data-name="Layer 1" xmlns="http://www.w3.org/2000/svg" viewBox="0 0 1200 120" preserveAspectRatio="none" class="svgWaveTop"><path d="M321.39,56.44c58-10.79,114.16-30.13,172-41.86,82.39-16.72,168.19-17.73,250.45-.39C823.78,31,906.67,72,985.66,92.83c70.05,18.48,146.53,26.09,214.34,3V0H0V27.35A600.21,600.21,0,0,0,321.39,56.44Z" class="shape-fill"></path></svg>').appendTo('.waveTop');
</script>
SITES.CSS
/* GLOBAL SITE CSS - ADD CSS TO AFFECT THE WHOLE SITE */
@media screen and (min-width:1200px) {
.rows-1200 .dmRespDesignRow, .rows-1200 .dmRespRow:not(.fullBleedMode) .dmRespColsWrapper { max-width: 1500px }
}
*#dm div.dmNewParagraph a,
*#dm div.dmCustomHtml a,
*#dm div.dmBlockElement a { text-decoration: none !important; font-weight: 700 !important; -webkit-transition: color 0.4s ease-in !important; -o-transition: color 0.4s ease-in !important; outline: 0 !important; }
*#dm div.dmCustomHtml a:hover,
*#dm div.dmNewParagraph a:hover,
*#dm div.dmBlockElement a:hover { color:#008083 !important; text-decoration: none !important; font-weight: 700 !important; }
/* WAVE TOP */
.svgWaveBtm { position: absolute; display: block; width: calc(100% + 1.3px); height: 30px; bottom: -1px; }
.svgWaveBtm .shape-fill { fill: #FFFFFF; } /* WAVE COLOUR AGAINST WHITE */
/*WAVE BOTTOM */
.svgWaveTop { position: absolute; display: block; width: calc(100% + 1.3px); height: 30px; top: -1px; }
.svgWaveTop .shape-fill { fill: #FFFFFF; } /* WAVE COLOUR AGAINST WHITE */
/*
CUSTOM WAVE COLOUR BETWEEN TWO COLOURED SECTIONS
.u_######## .svgWaveTop .shape-fill { fill: var(--color_6); }
.u_######## .svgWaveBtm .shape-fill { fill: var(--color_6); }
*/
/* ROUND MAP IN THE FOOTER */
.dmFooterContainer .mapContainer { border-radius:50%; }
/* HIDE THE SUB LOGOS FROM THE FOOTER FRON HOME */
#dm .dm-layout-home div.u_1968446977 { display:none; }
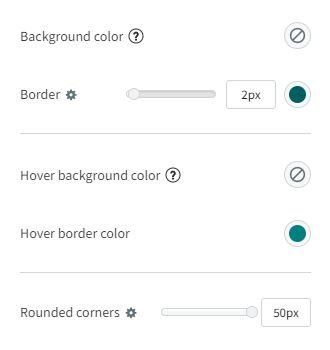
Button Setup
- Background color: Transparent
- Border: 2px (Branding color)
- Hover background color: Transparent
- Hover border color: Branding color
- Rounded corners: 50px
Social Icons
The social icons top-right will default to the image below, they need to be connected to the content > business info.

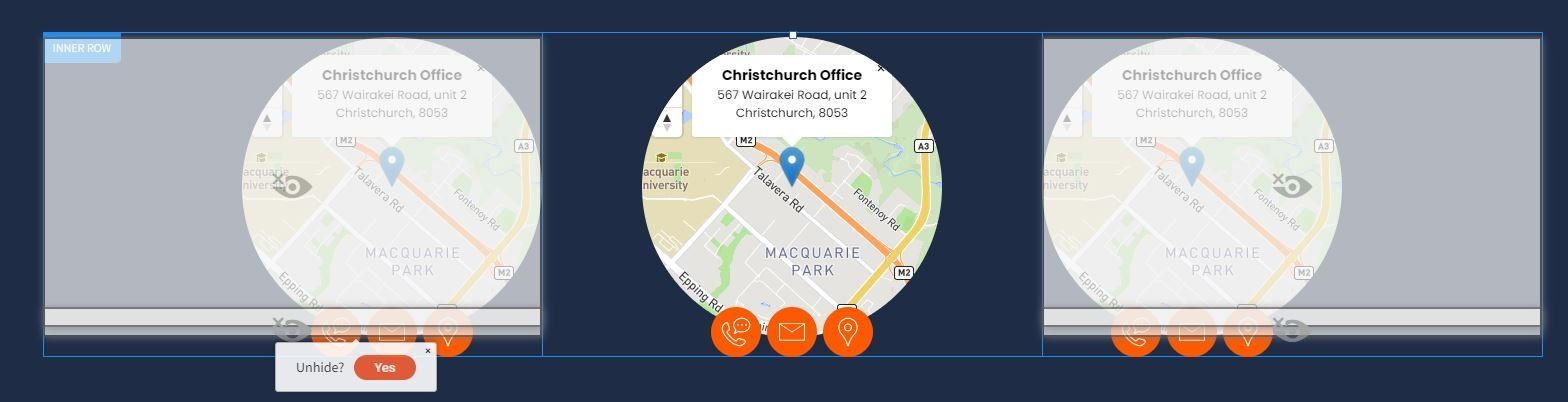
Map Feature
Two other copies of the map in the footer map feature are hidden so you can unhide/add/remove as necessary.
ADDITIONAL INFO
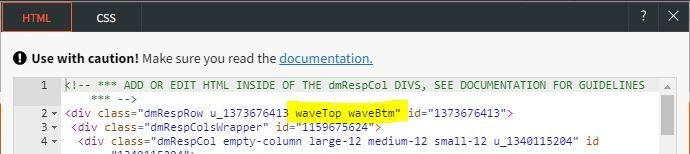
Adding Waves to Rows
To add waves to other rows: Go into the ROW CSS/HTML and add the class "waveTop" for waves on the top or "waveBtm" for wave on the bottom.
Changing the Wave colours between one specific section.
In the case where you delete a section and you have two wave sections with a background colour and a white strip in the middle you can change either the top or bottom wave in a section to have a custom colour
For this example: I will change the bottom colour of the navy blue wave section.
